Turbocharger Installation Best Practices: 9 Steps to Maximize Performance and Prevent Early Failure

In today’s high-demand operating environments, heavy equipment engines are pushed harder than ever—expected to deliver maximum power output while keeping fuel consumption and emissions under control. Turbochargers play a central role in making that possible.
By compressing air into the combustion chamber, turbos significantly boost engine efficiency and performance. But they also operate under extreme conditions—spinning at over 100,000 RPM and exposed to intense heat and pressure. That makes them both powerful and vulnerable.
 One of the most common reasons for premature turbo failure isn’t manufacturing defects—it’s improper installation. A small oversight like a contaminated oil feed line or an unclean air duct can severely damage a new turbo within minutes of startup.
Whether you’re a maintenance technician, service manager, or operations lead, following a precise and thorough installation process is key to protecting your investment and keeping equipment running smoothly.
Here’s a step-by-step guide to help ensure your next turbo installation is a success:
- Diagnose Before You Replace
Before fitting a new turbocharger, always investigate why the previous unit failed. Was it oil contamination? A blocked air intake? Worn seals? If the underlying problem isn’t addressed, even the best turbo won’t last.
- Clean Everything—Thoroughly
Particles left in the air intake, intercooler, or exhaust manifold can destroy a new turbo within seconds of startup. Inspect and clean these components carefully. Don’t hesitate to replace a dirty or damaged air filter—it’s a small cost that protects a big investment.
- Use New Gaskets & Clear Oil Lines
Turbochargers are sensitive to blockages and pressure losses. Always install new gaskets and thoroughly clean the oil feed and drain lines. Carbon buildup or sludge here can choke the oil supply and lead to bearing failure.
- Change Oil & Filters First
Dirty oil is the enemy of any turbo. Before installation, perform a full oil and filter change using high-quality lubricants. This ensures clean oil reaches the turbo from the very first revolution.
- Check Fit & Seal
Mount the turbo carefully onto the exhaust manifold. Confirm that the turbine inlet gasket is seated correctly and provides a tight seal. A misaligned gasket can cause exhaust leaks and impact turbo performance.
- Pre-Lube the Turbo
Before you start the engine, pour clean engine oil directly into the turbo’s oil feed hole. Rotate the shaft slowly by hand to ensure the bearings are well-lubricated. This simple step significantly reduces wear during initial startup.
- Crank to Build Oil Pressure
With the fuel system off to prevent ignition, crank the engine for about 10–15 seconds. This helps build oil pressure and ensures the turbo gets oil before it spins at high speed.
- Tighten Connections & Check for Leaks
Secure all ducts, flanges, and oil lines. A quick test with soapy water can reveal gas leaks at joints or gaskets—small leaks today can lead to big problems tomorrow.
- Let the Engine Idle
After installation, let the engine idle for 20–30 minutes. This allows the oil to circulate fully through the system and gives you time to listen for unusual sounds or spot any early warning signs.
Why This Matters
 A turbocharger is a high-precision component operating under extreme conditions. Proper installation isn’t just about bolting it on—it’s about creating the right conditions for it to thrive. Skipping even one step can lead to early failure, warranty issues, and added downtime.
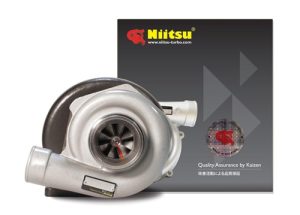
We supply high-quality turbos and cartridges from trusted names like NITSU, Blumaq, Schweitzer, Garrett, and Interparts—but even the best equipment needs expert handling.
Need help diagnosing a failed turbo or choosing the right replacement? Our team is here to support you with technical guidance and parts that perform under pressure.